
Dox Studio hosting · Outlook for Windows
With IMAP, every email stays on your hosting and the space fills up. With POP, Outlook takes the email to your computer and deletes it from the hosting. Here is how to switch in Outlook without losing anything, in about 30 minutes.
Before you start
- One computer only. With POP, your email lives on that computer. Your phone and Webmail stop seeing the emails Outlook already downloaded. If the account is used on several devices, stay with IMAP.
- Classic Outlook. This guide is for the Outlook desktop app for Windows (Microsoft 365, 2021, 2019 or 2016). If you see the New Outlook toggle turned on at the top right, turn it off to go back to classic.
- The mailbox password. Outlook asks for it when you add the account again. If you don’t have it, set a new one in cPanel before you start.
Why changing one setting isn’t enough: Outlook can’t turn an IMAP account into POP. You save what it has, remove the account and add it again as POP. The order matters: if you remove the IMAP account before saving its folders, your sent items and the folders you created disappear from that computer.
1. Save everything in the IMAP account
- Press F9 (Send/Receive All Folders) and wait until the bar at the bottom says All folders are up to date.
- Go to File › Open & Export › Import/Export.
- Choose Export to a file, then Outlook Data File (.pst).
- Select the whole account (the line with your address, at the very top) (1) and check Include subfolders (2).
- Save it in Documents with a clear name, for example
email-imap-until-today.pst, and click Finish. You don’t need a password on it.
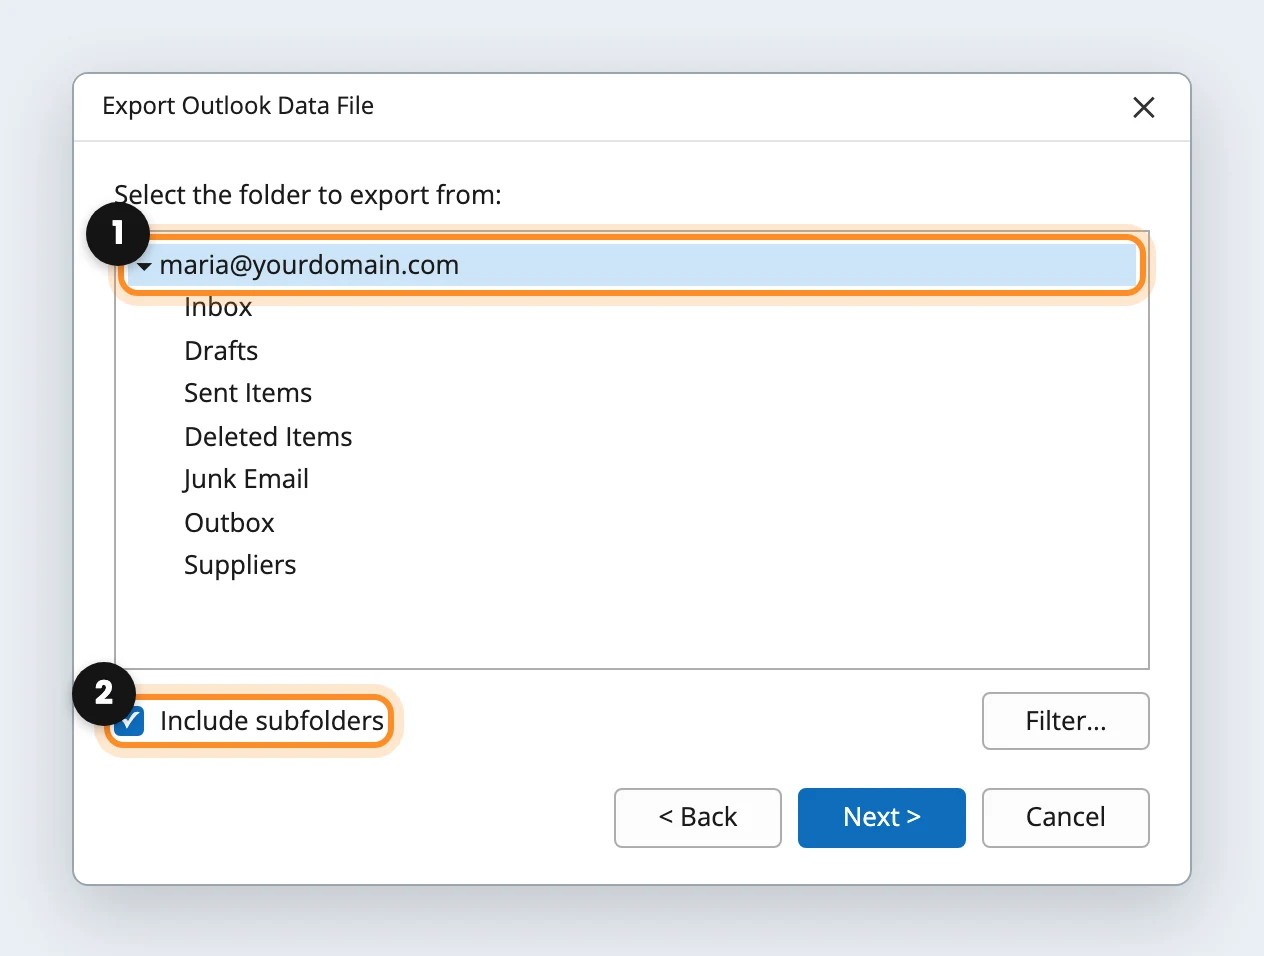
A large mailbox takes a few minutes. When it finishes, check in Documents that the file is there and is about the size of the mailbox.
2. Remove the IMAP account
- Go to File › Account Settings › Account Settings.
- On the Email tab, select the account (1) and click Remove (2). Outlook warns that it deletes its local copy: that’s expected, you saved it in step 1.
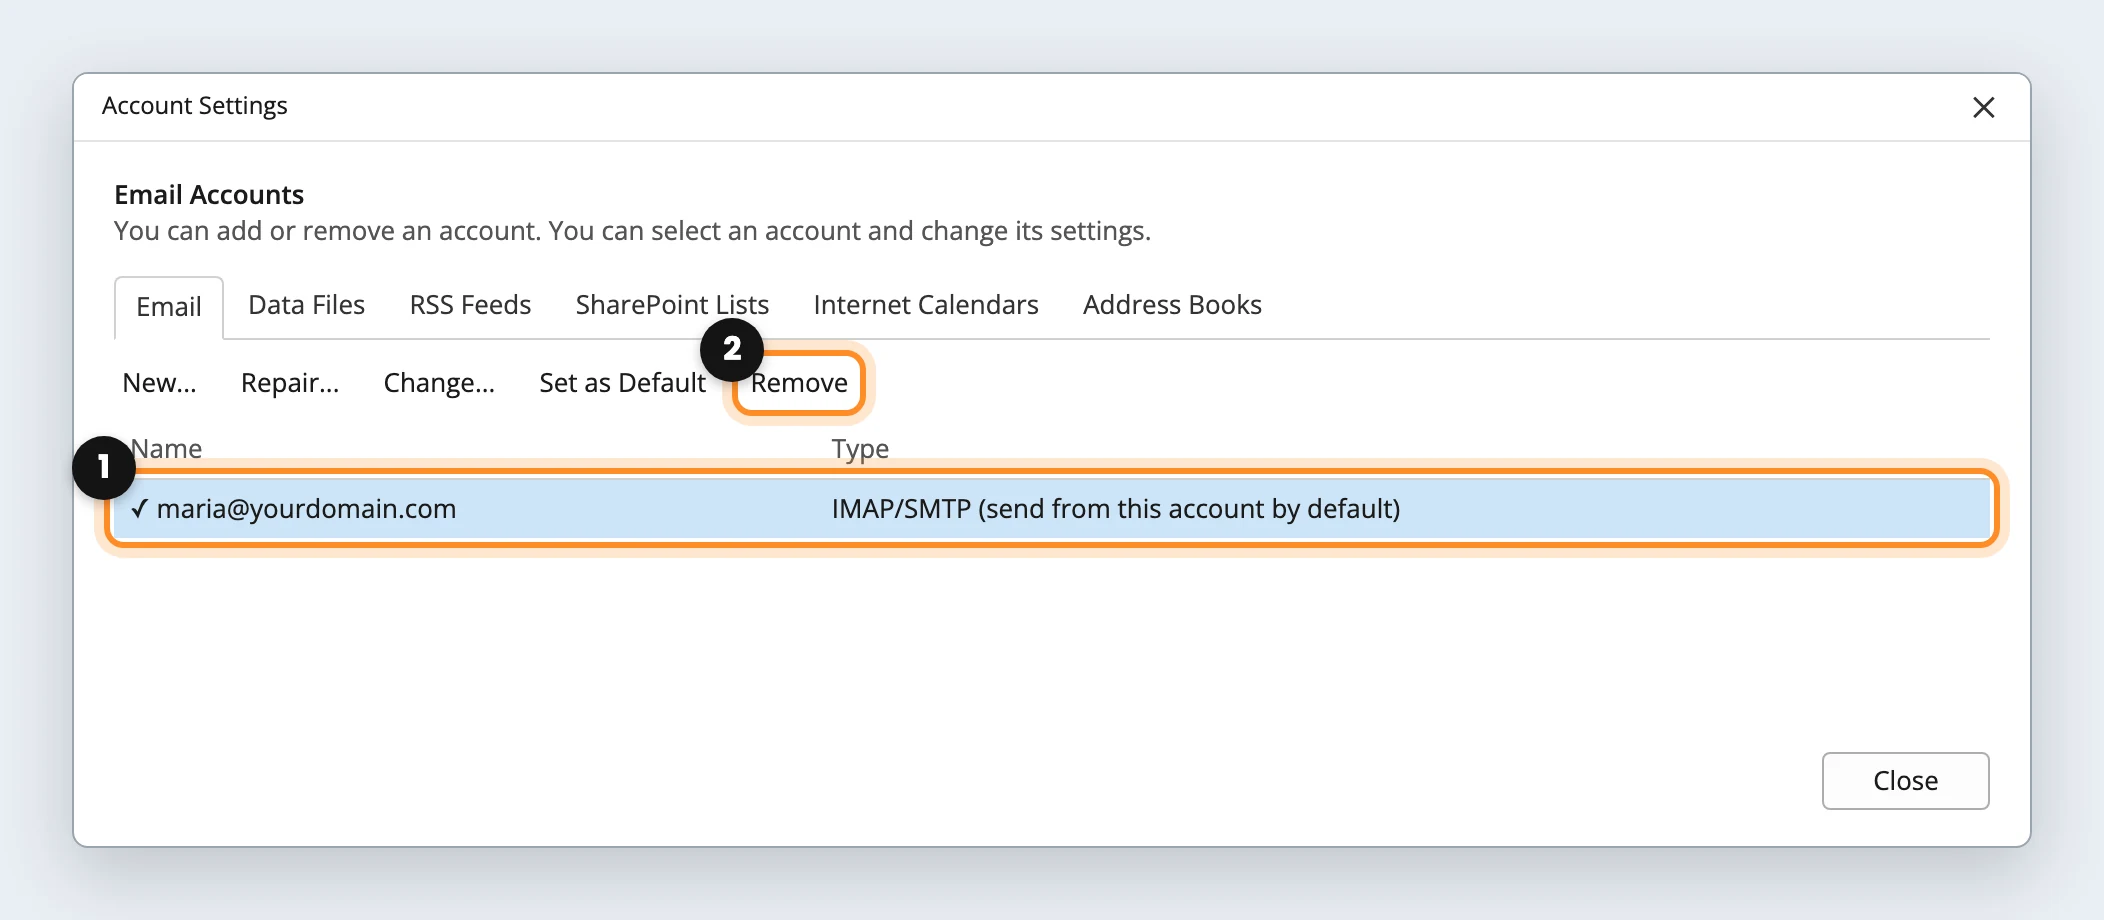
Nothing is deleted on the hosting: every email stays there until the POP account downloads it.
3. Add the account as POP
- Go to File › Add Account and type the address.
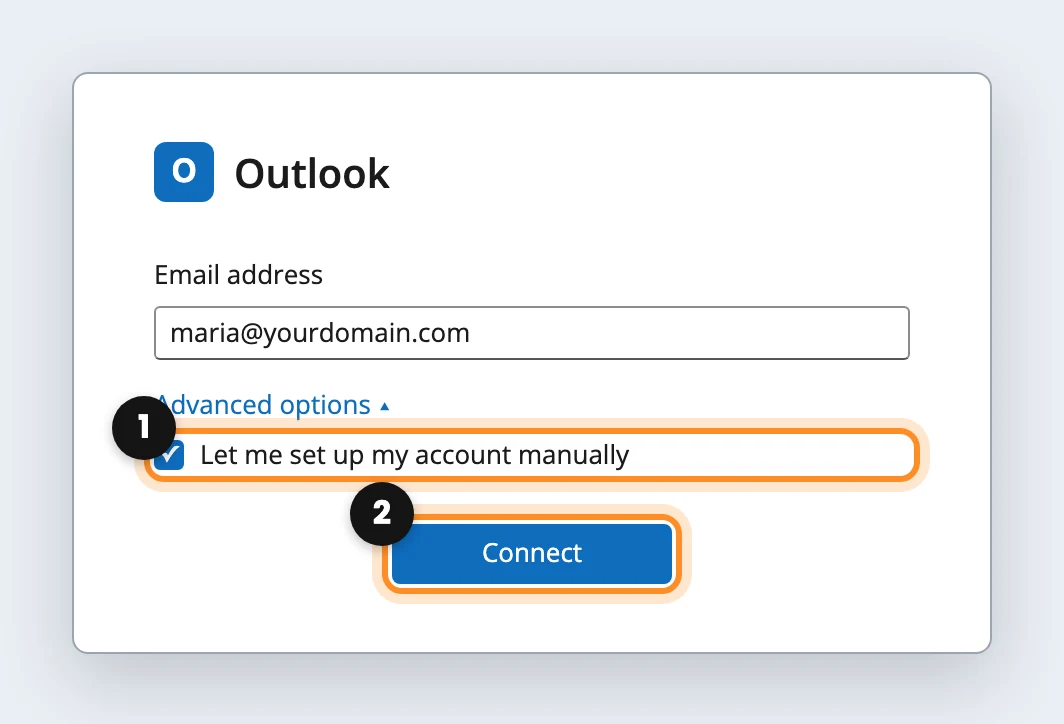
- Open Advanced options, check Let me set up my account manually (1) and click Connect (2).
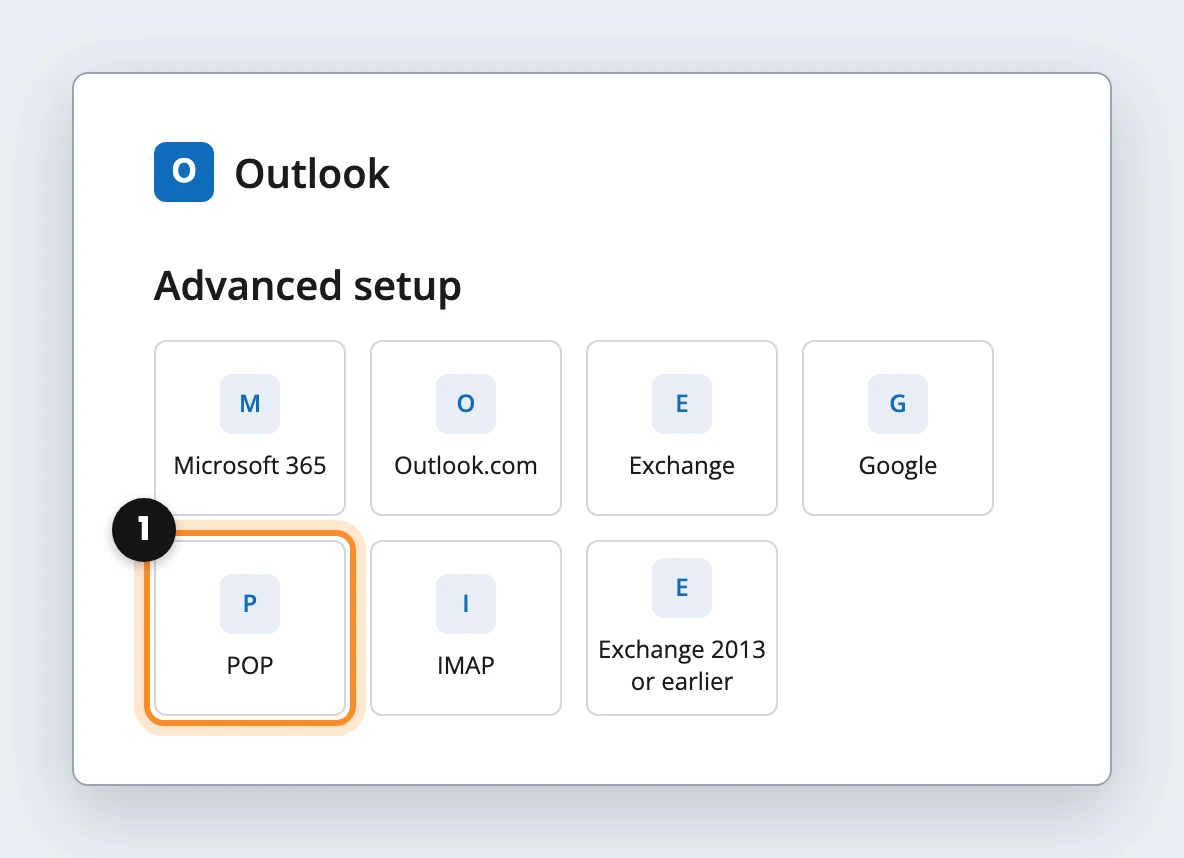
- Choose POP and enter these settings:
| Incoming mail | mail.yourdomain.com, port 995, check This server requires an encrypted connection (SSL/TLS) |
|---|---|
| Outgoing mail | mail.yourdomain.com, port 465, encryption SSL/TLS |
| Password | The mailbox password |
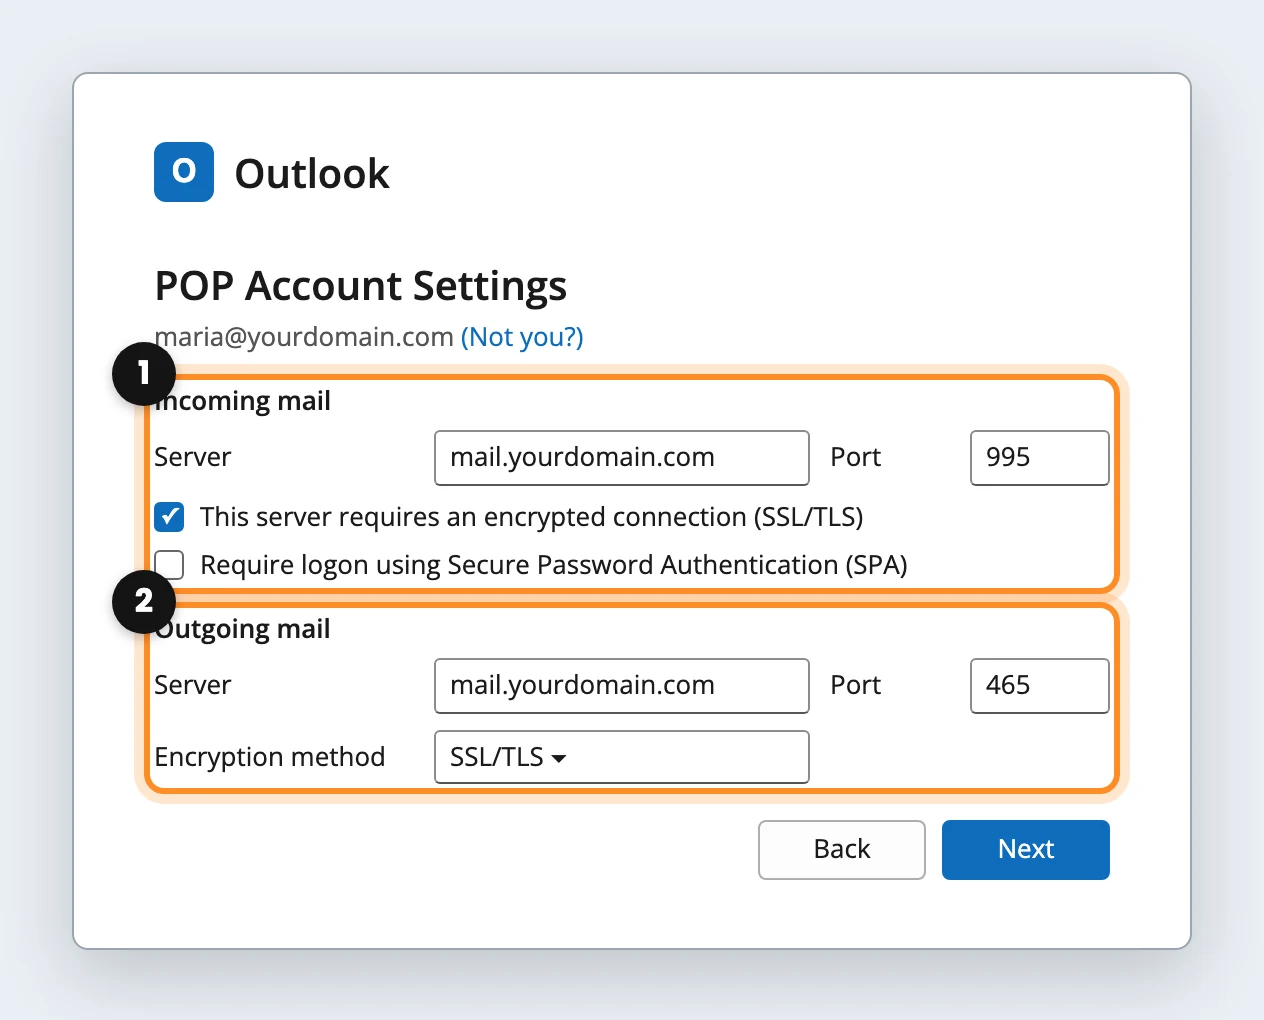
- Click Connect. If Outlook asks where to deliver the email, keep the new data file it suggests.
4. Make it delete from the server
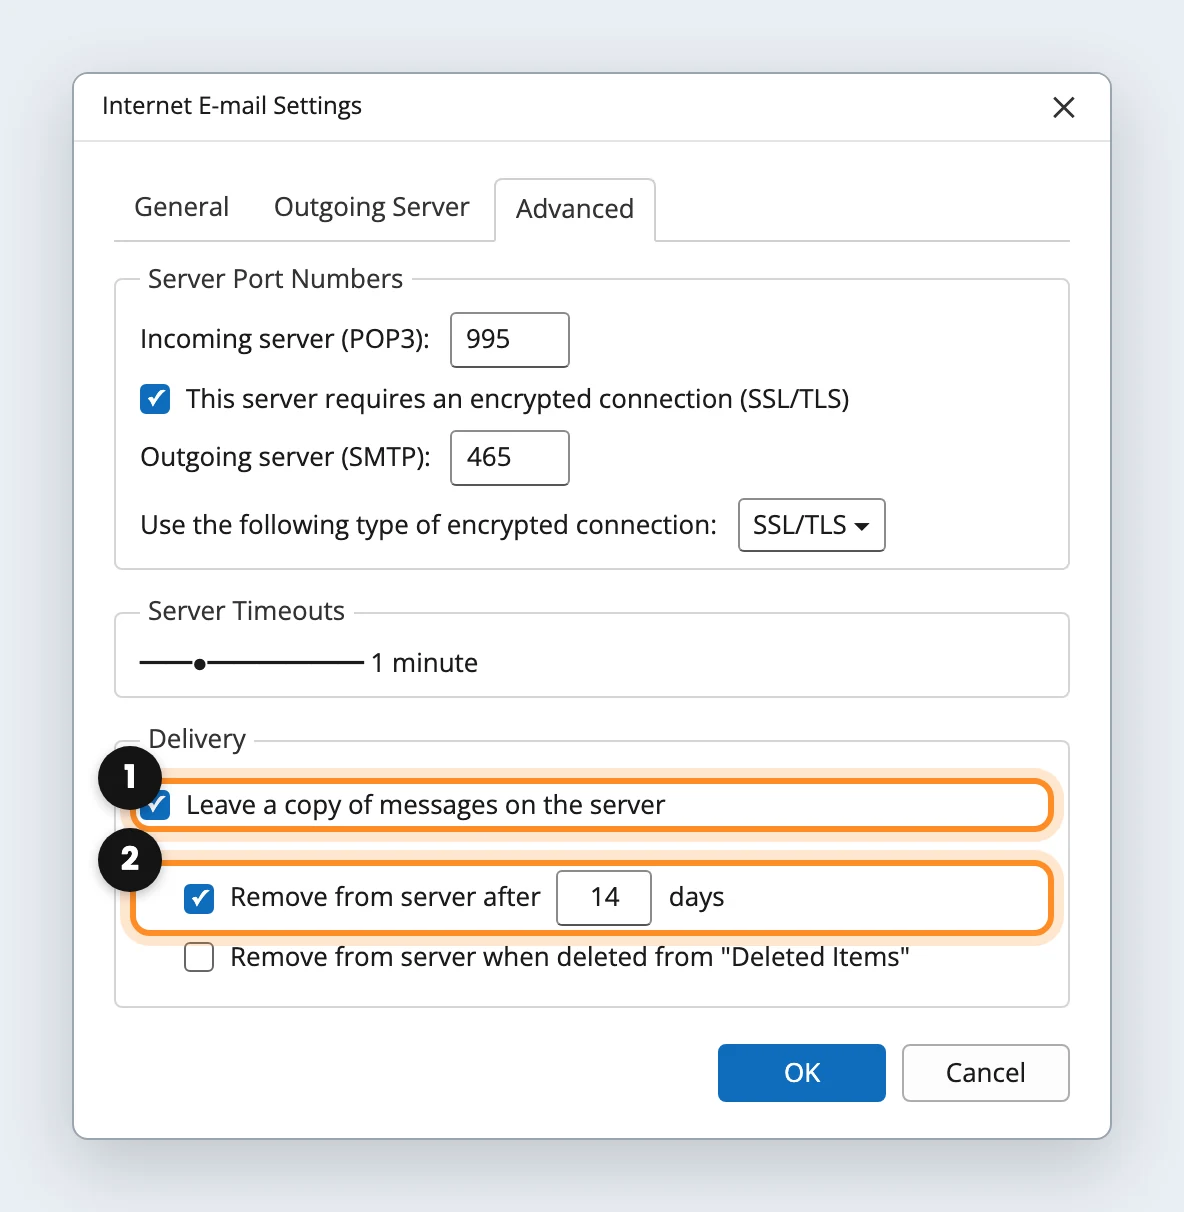
This is the setting that frees the hosting space. Without it, POP leaves a copy of everything on the server and the mailbox keeps filling up.
- Go to File › Account Settings › Account Settings, select the POP account and click Change.
- Click More Settings and open the Advanced tab.
- Under Delivery, keep Leave a copy of messages on the server checked (1) and also check Remove from server after 14 days (2). You get two weeks of margin, and then the hosting empties itself.
- Click OK, Next and Finish.
No More Settings button? Newer Microsoft 365 versions open a simplified panel. Close Outlook and go through Windows: Control Panel › Mail (Microsoft Outlook) › Email Accounts, select the account and click Change › More Settings.
5. Open the emails you saved
- Go to File › Open & Export › Open Outlook Data File.
- Choose the
.pstfrom step 1. It shows up in the left column, under your account, with your sent items and all your folders (1).
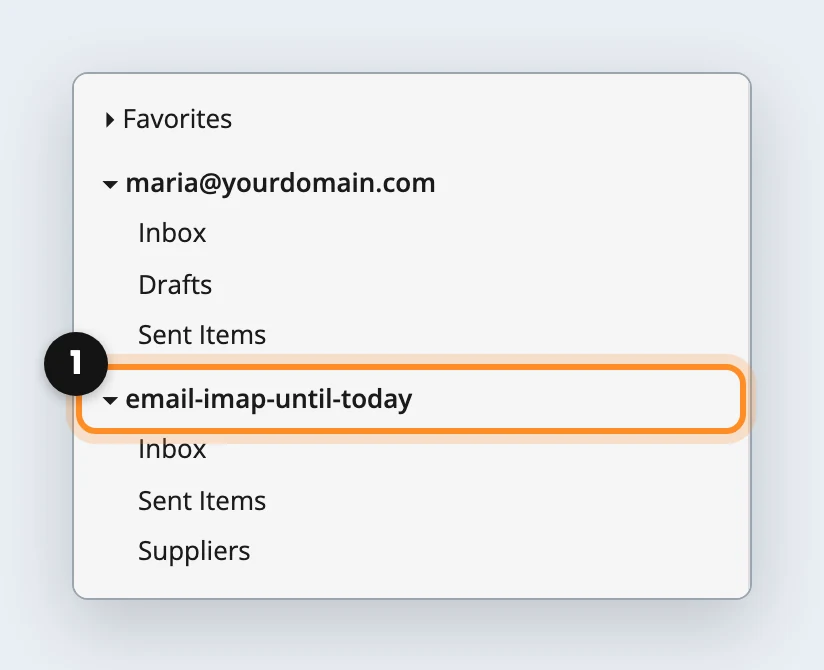
The POP inbox fills up with what was on the server, so at first you’ll see those emails in the saved file too. That’s normal, and it takes no hosting space.
Back up that computer
With POP, the only place your email lives is the computer. If the drive fails, it’s gone. Once a week, close Outlook and copy the .pst files in Documents › Outlook Files (and the one you saved in step 1) to an external drive or the cloud.
Rather have us do it? Open a ticket from your client area with the address you want to switch, and we’ll set a time to connect to that computer.