
Dox Studio hosting · all plans
Your website’s files live in the public_html folder. Manage them in your browser with cPanel’s File Manager, or from your computer with FTP.
Open File Manager
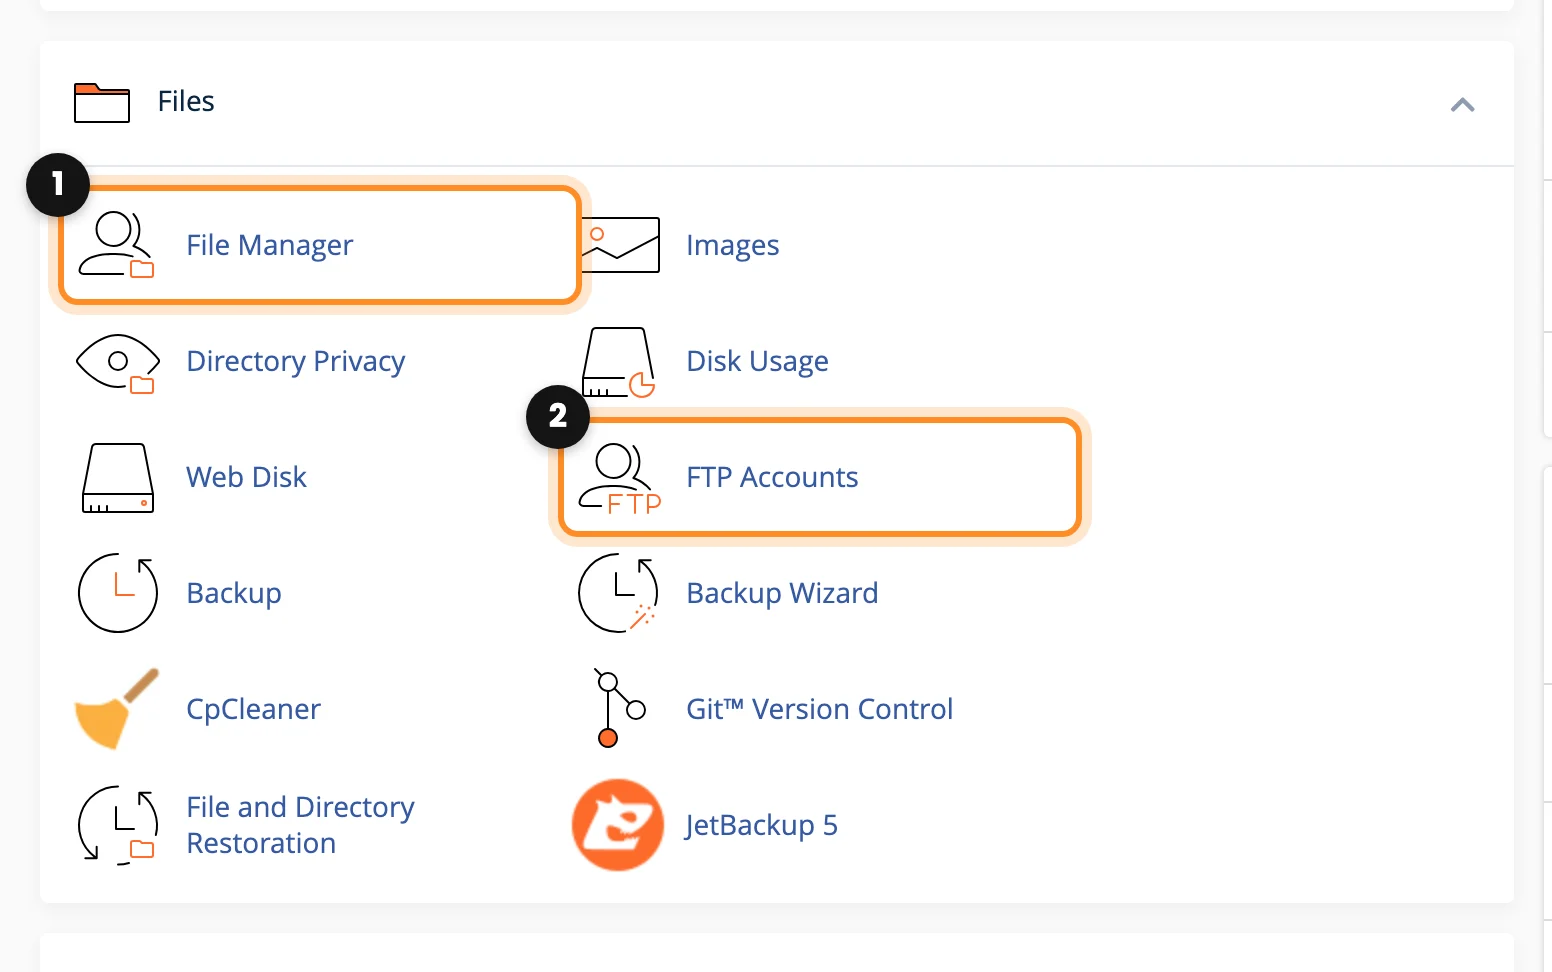
- Open cPanel from your client area and go to the Files section.
- Click File Manager (1). It opens in a new tab. FTP Accounts (2), right there, is for connecting from your computer (see below).
- On the left you see the folders of your account. Click public_html (1): that folder is your website. What you put in it is what people see at yourdomain.com.
- The buttons at the top work on what you select in the list: Upload (2), Edit, Permissions, Extract, Delete and the rest.
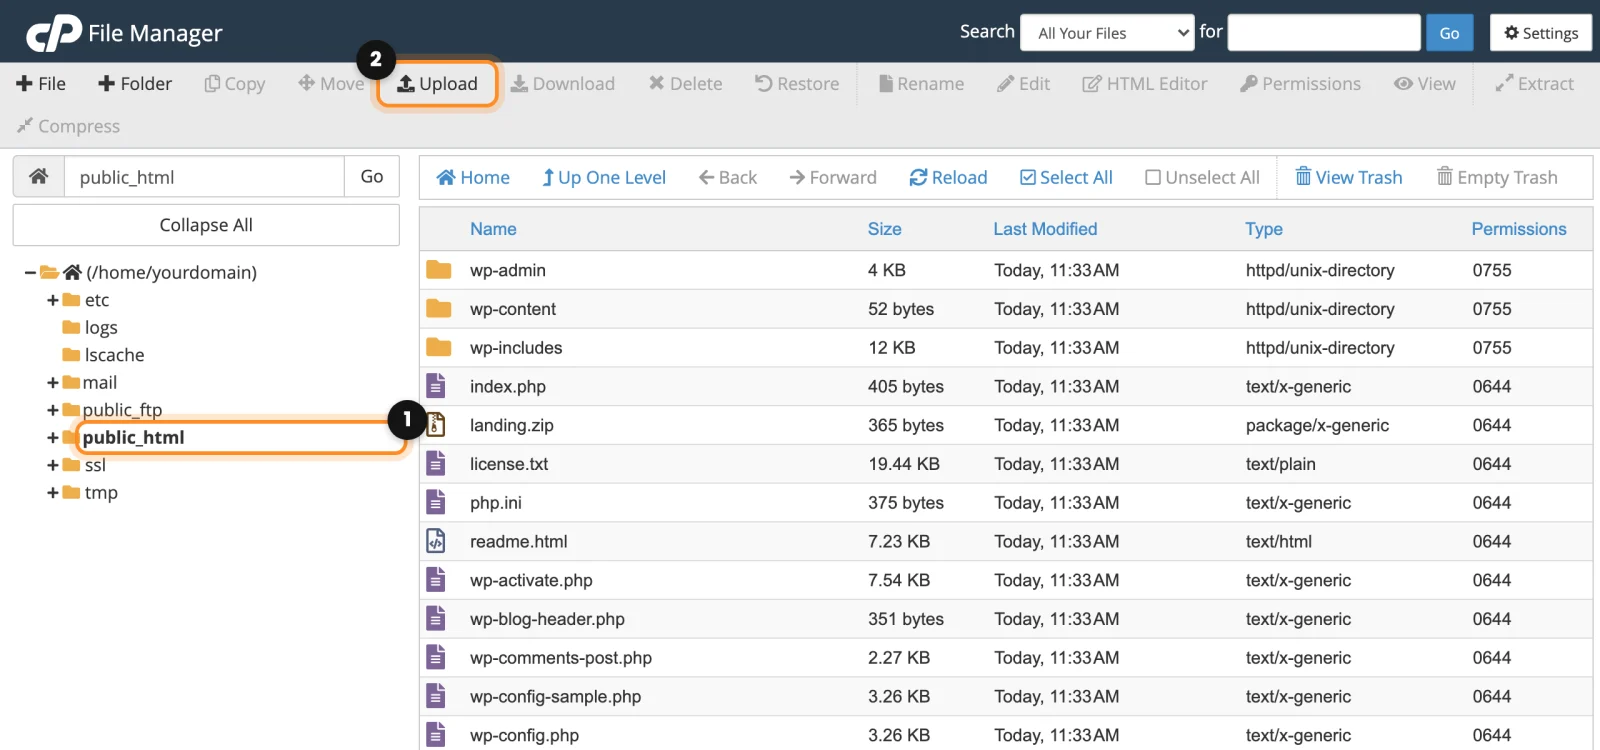
In a WordPress site, wp-admin and wp-includes are WordPress itself, wp-content holds your theme, your plugins and the images you uploaded, and wp-config.php connects the site to its database.
Files whose name starts with a dot, like .htaccess, are hidden. To see them, click Settings (top right), tick Show Hidden Files (dotfiles) and click Save.
Upload files
- Open the folder where the files go (for example
public_html) and click Upload. - Drag your files into the box, or click Select File (1). Each file shows a bar while it uploads.
- If a file with the same name is already there, the upload stops for that file. To replace it, tick Overwrite existing files (2) before uploading.
- When the bars are full, click Go Back to “/home/…/public_html” at the bottom of the page.

Upload a whole folder in a zip
File Manager uploads files, not folders. To upload many files or a folder, compress them into a .zip on your computer, upload the zip and unpack it here:
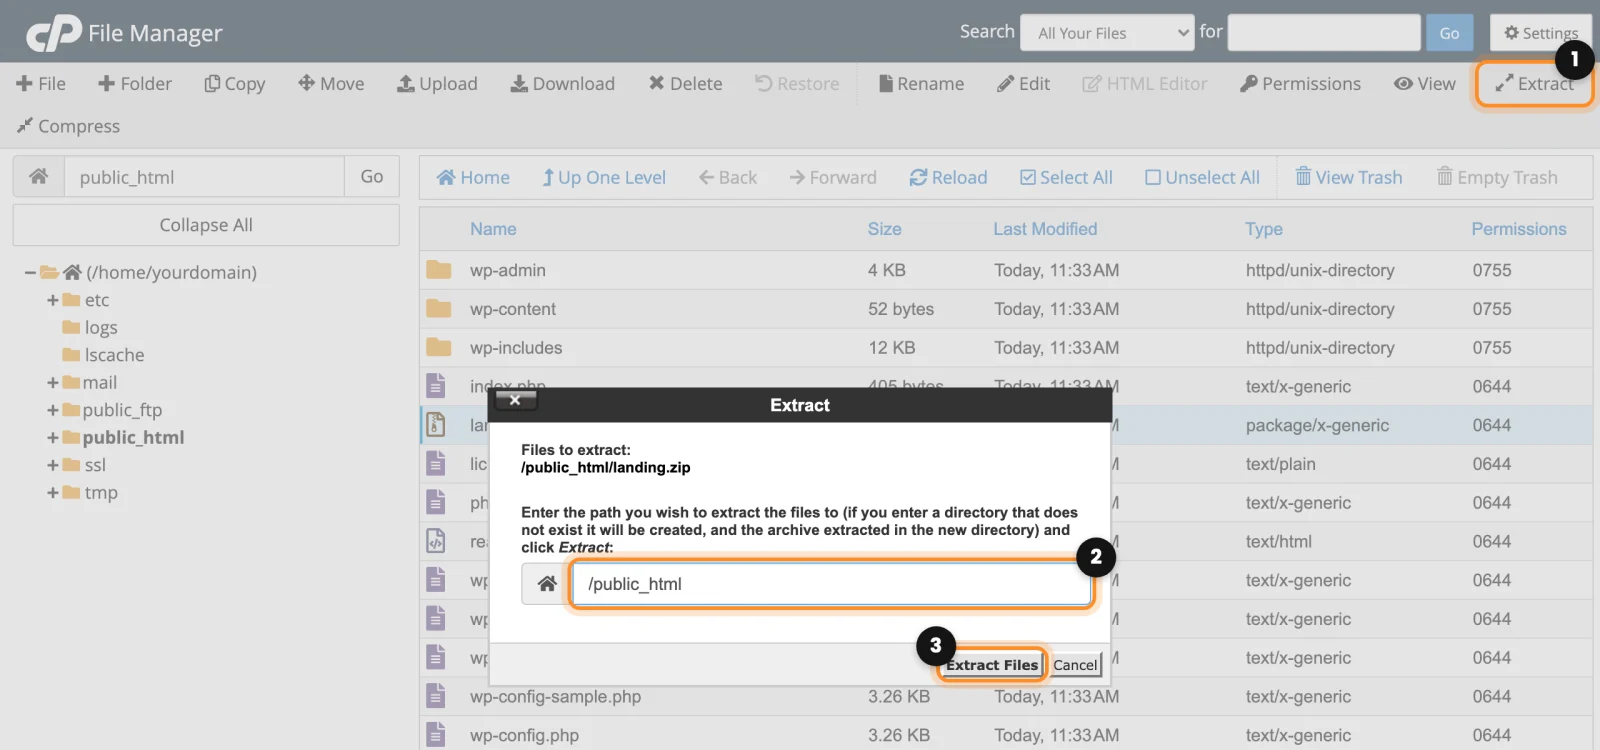
- Click the zip file once to select it and click Extract (1).
- In the box (2), check the folder where it will be unpacked. If you type a folder that doesn’t exist, it is created.
- Click Extract Files (3). When it finishes, you can delete the zip.
Edit a file
- Select the file and click Edit. In the window about the character encoding, click Edit again.
- The file opens in a new tab. Make the change and click Save Changes, then Close.
Before changing a file you don’t know, download a copy of it (Download): if something breaks, you upload it again and it is back as it was.
Permissions
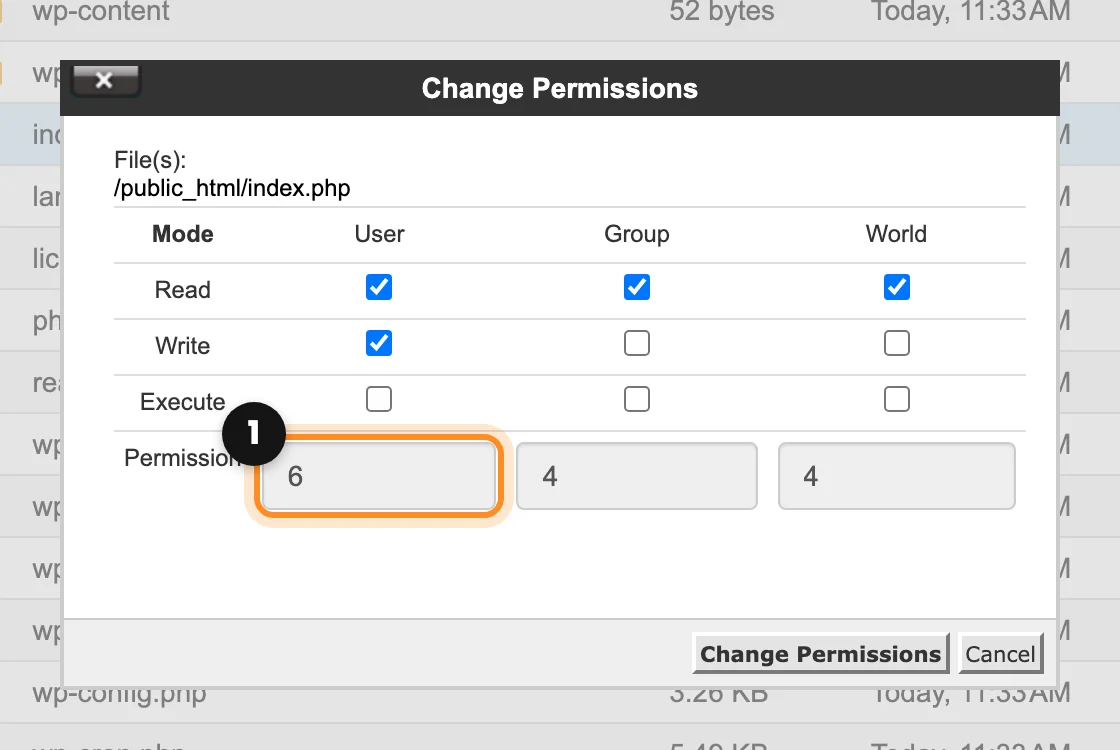
Permissions say who can read and change each file. The normal values are 644 for files and 755 for folders, and that is what you get when you upload. You only need to touch them if a page shows a “403 Forbidden” error: select the file, click Permissions, write the number (1) and click Change Permissions.
Delete without scares
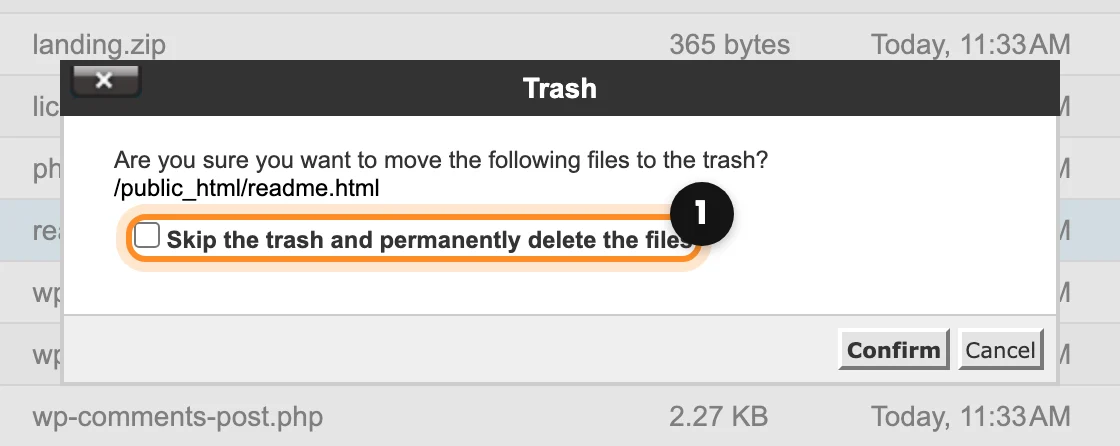
Delete moves the file to the trash, not away for good. Leave Skip the trash and permanently delete the files (1) unticked. If you deleted something by mistake, click View Trash, select it and click Restore. Empty Trash deletes it for good.
Careful with WordPress: don’t delete, move or rename wp-config.php or the wp-admin, wp-includes and wp-content folders. Without them the website stops working. If something is lost anyway, we keep a copy of your account from each of the last 7 days: see Backups: what we keep and how to restore.
Create an FTP account
FTP lets you move files between your computer and your hosting with a program, which is more comfortable for big uploads. It is also the safe way to give access to a designer: create an account just for them and delete it when they finish.
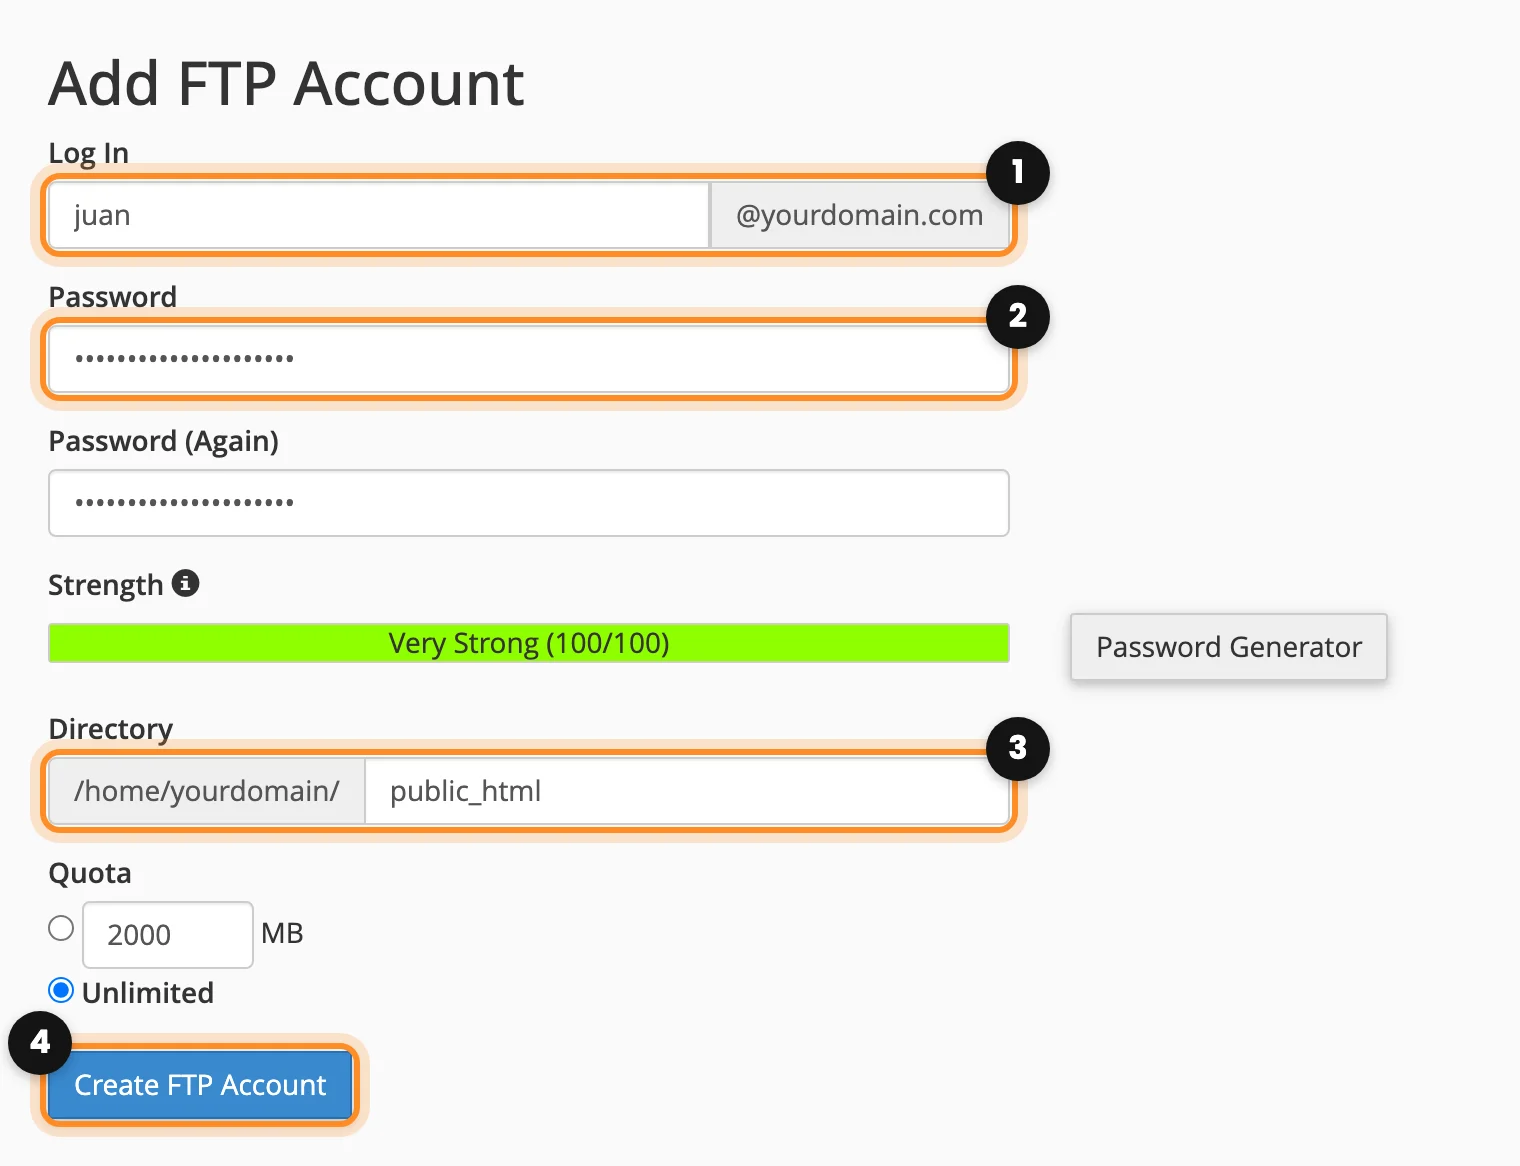
- In cPanel, open FTP Accounts, in the Files section.
- In Log In (1), write a name, for example
juan. The user will be juan@yourdomain.com. - Write the Password (2) twice, or click Password Generator for a strong one.
- In Directory (3), cPanel suggests a new empty folder. To give access to the website, delete what it wrote and type
public_html. The account only sees that folder and what is inside it. - Leave Quota in Unlimited and click Create FTP Account (4).
Your cPanel username and password also work in FTP and see the whole account, not only the website. For everyday work, and always for other people, use an FTP account like this one.
Connection details
In the list of accounts, Configure FTP Client shows the details of each one (1). These are the ones to use in your FTP program:
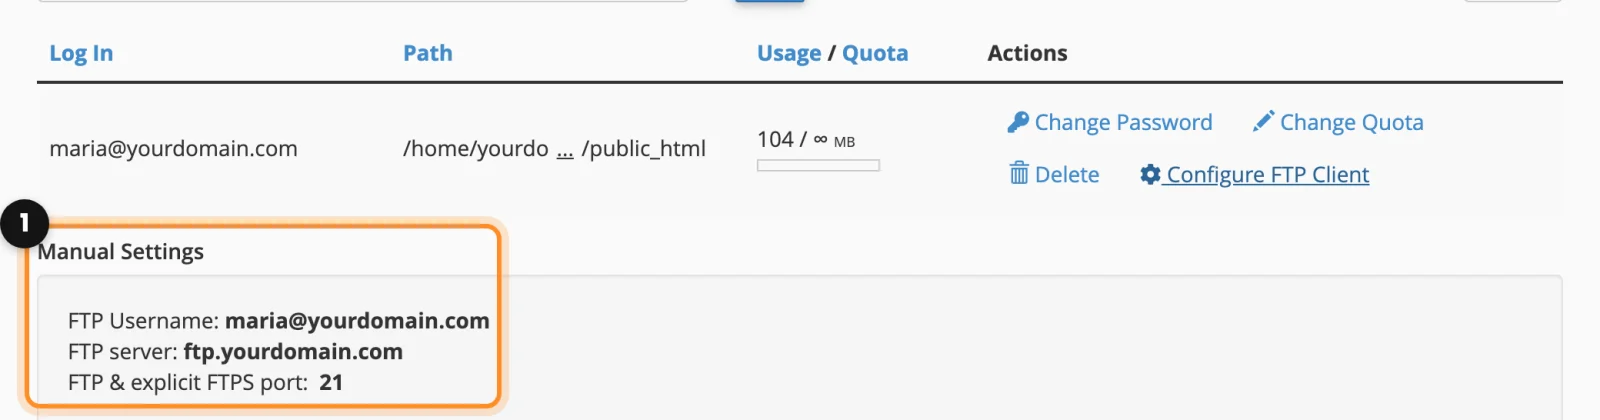
- Server (host):
us1.doxstudio.com. cPanel suggests ftp.yourdomain.com, which also works once your domain points to us, but the server name works from day one and matches our security certificate. - Port: 21.
- Encryption: explicit FTP over TLS (also called FTPES). Your password and your files travel encrypted.
- User: the full name of the account, for example juan@yourdomain.com, and its password.
- Transfer mode: passive, which is what FTP programs use by default.
Connect with FileZilla
FileZilla is a free FTP program for Windows and Mac. Download FileZilla Client from filezilla-project.org.
- Open FileZilla and go to File › Site Manager. Click New site and give it a name, for example your domain.
- Fill in: Protocol “FTP – File Transfer Protocol”, Host
us1.doxstudio.com, Port21, Encryption “Require explicit FTP over TLS”, Logon Type “Normal”, and your User and Password. - Click Connect. The first time, FileZilla shows the Unknown certificate window with the server’s certificate (issued to us1.doxstudio.com). Tick Always trust this certificate in future sessions and click OK.
- On the left you see your computer and on the right your hosting. If the account’s directory is
public_html, you are already inside your website. Drag files from one side to the other to upload or download them.
If the connection fails, check the user: it is the full name with @yourdomain.com. If it still doesn’t connect, open a ticket and tell us the error FileZilla shows.
SFTP and SSH: most plans don’t include SSH access, so SFTP isn’t available on them. FTP over TLS, as above, is just as safe for your files. If you need SSH, open a ticket and we tell you whether your plan includes it.