Free plugin · Dox POS 0.41 or newer · Needs WooCommerce
Dox POS is free on WordPress.org. You install it like any other plugin, and the register opens at your site’s address followed by /pos, on the phone or on the computer.
Install the plugin
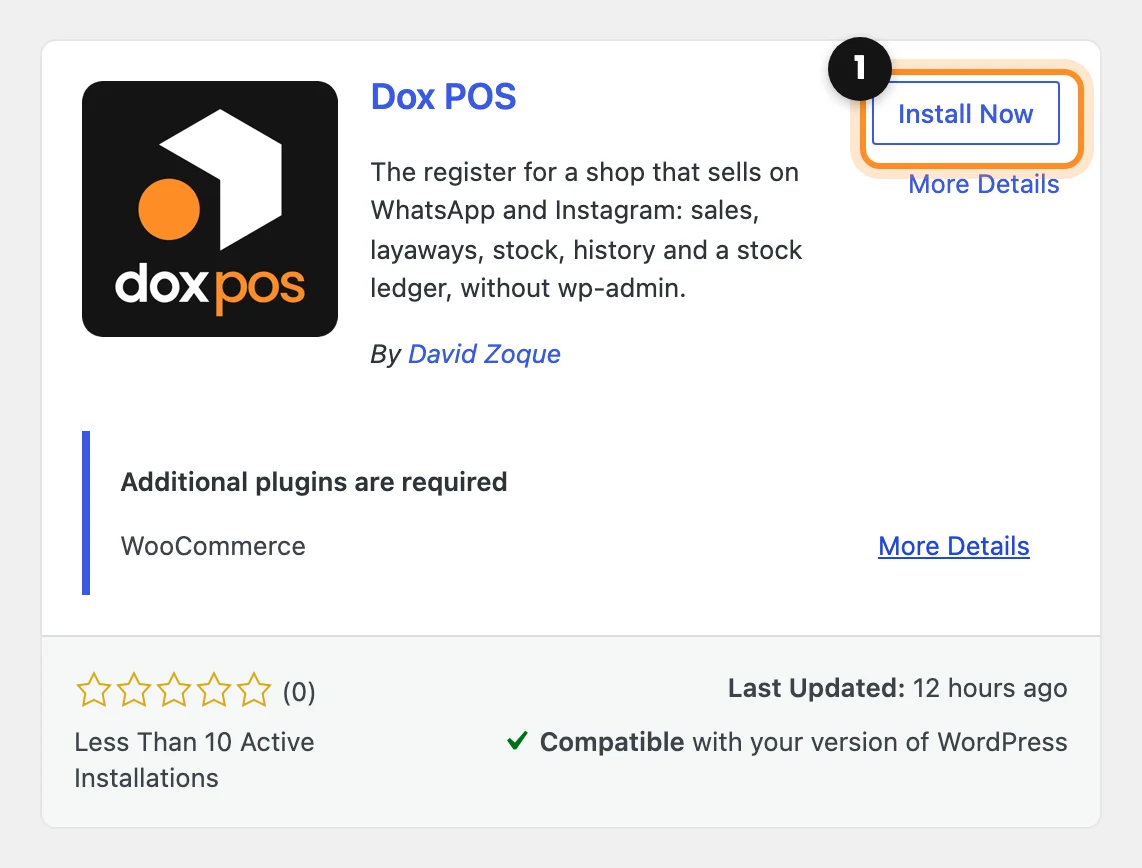
- In WordPress, go to Plugins › Add New Plugin and search for Dox POS.
- On the Dox POS card, click Install Now (1).
- When it finishes, the same button says Activate (2). Click it.
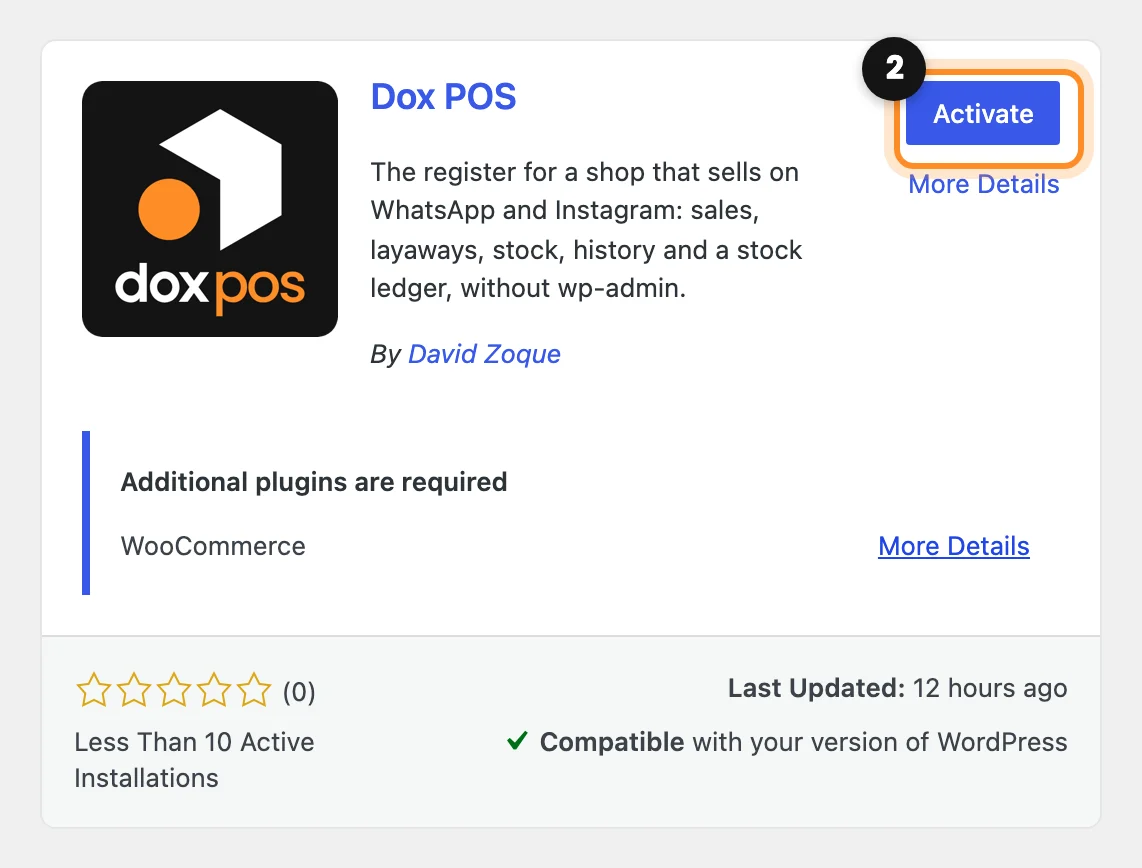
Note: Dox POS runs on top of WooCommerce. If your site doesn’t have it yet, the card says so under “Additional plugins are required”: install and activate WooCommerce first.
Open the register
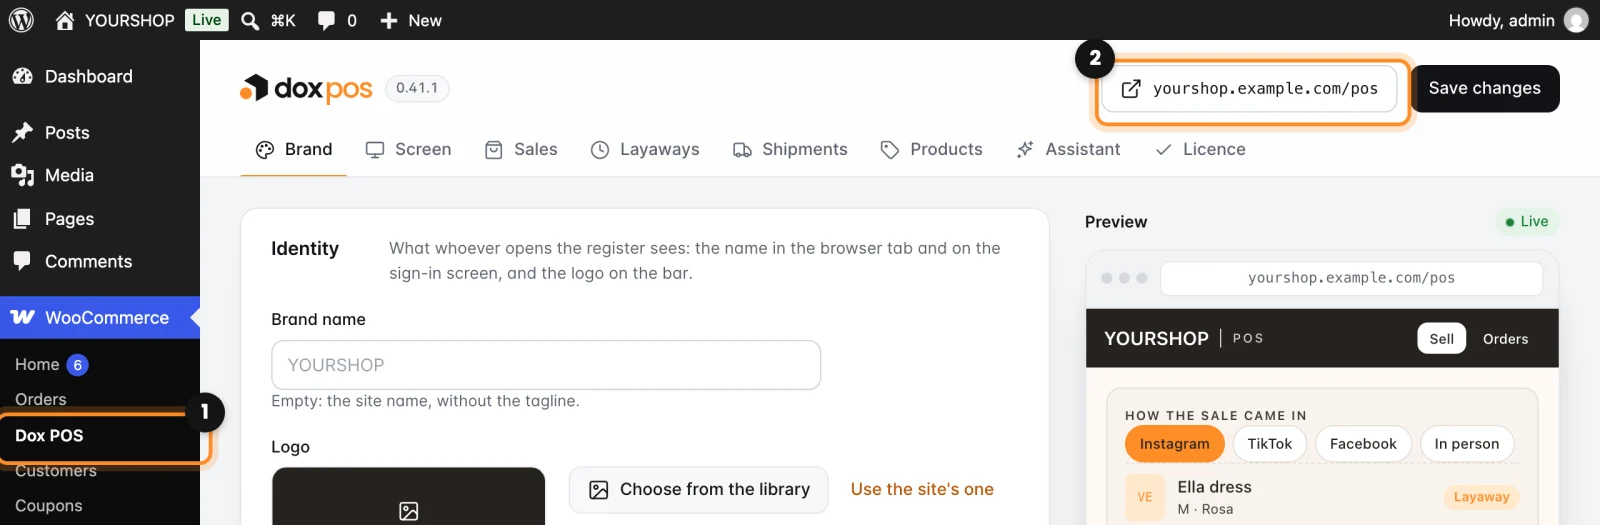
- Go to WooCommerce › Dox POS (1). If you use other Dox Studio plugins, it is under Dox Plugins › POS.
- The address of your register is at the top right (2): your site followed by
/pos(/cajaon a site in Spanish). Click it, or type it on the phone you sell with.
- Sign in with your WordPress user. Administrators and shop managers get in, and so does anyone with the Cashier role.

Tip: keep the register one tap away. On the phone, add the page to the home screen from the browser’s share menu.
Make it yours
Everything is in WooCommerce › Dox POS, and what you change shows up in the preview on the right before you save. In Brand you set the name, the logo and the five colors of the register. In Sales, how the sales come in and the payment methods: they start with the ones of your store’s country (WooCommerce › Settings › General), and you can rename them, turn them off or add your own.
Next: Record a sale
[…] Before this: Install Dox POS and open the register […]