
Free plugin · Dox POS 0.41 or newer
The register can wear your brand: your logo on the bar, your five colors and an address that is easy to remember. You change all of it in WooCommerce › Dox POS, and the preview on the right shows each change before you save.
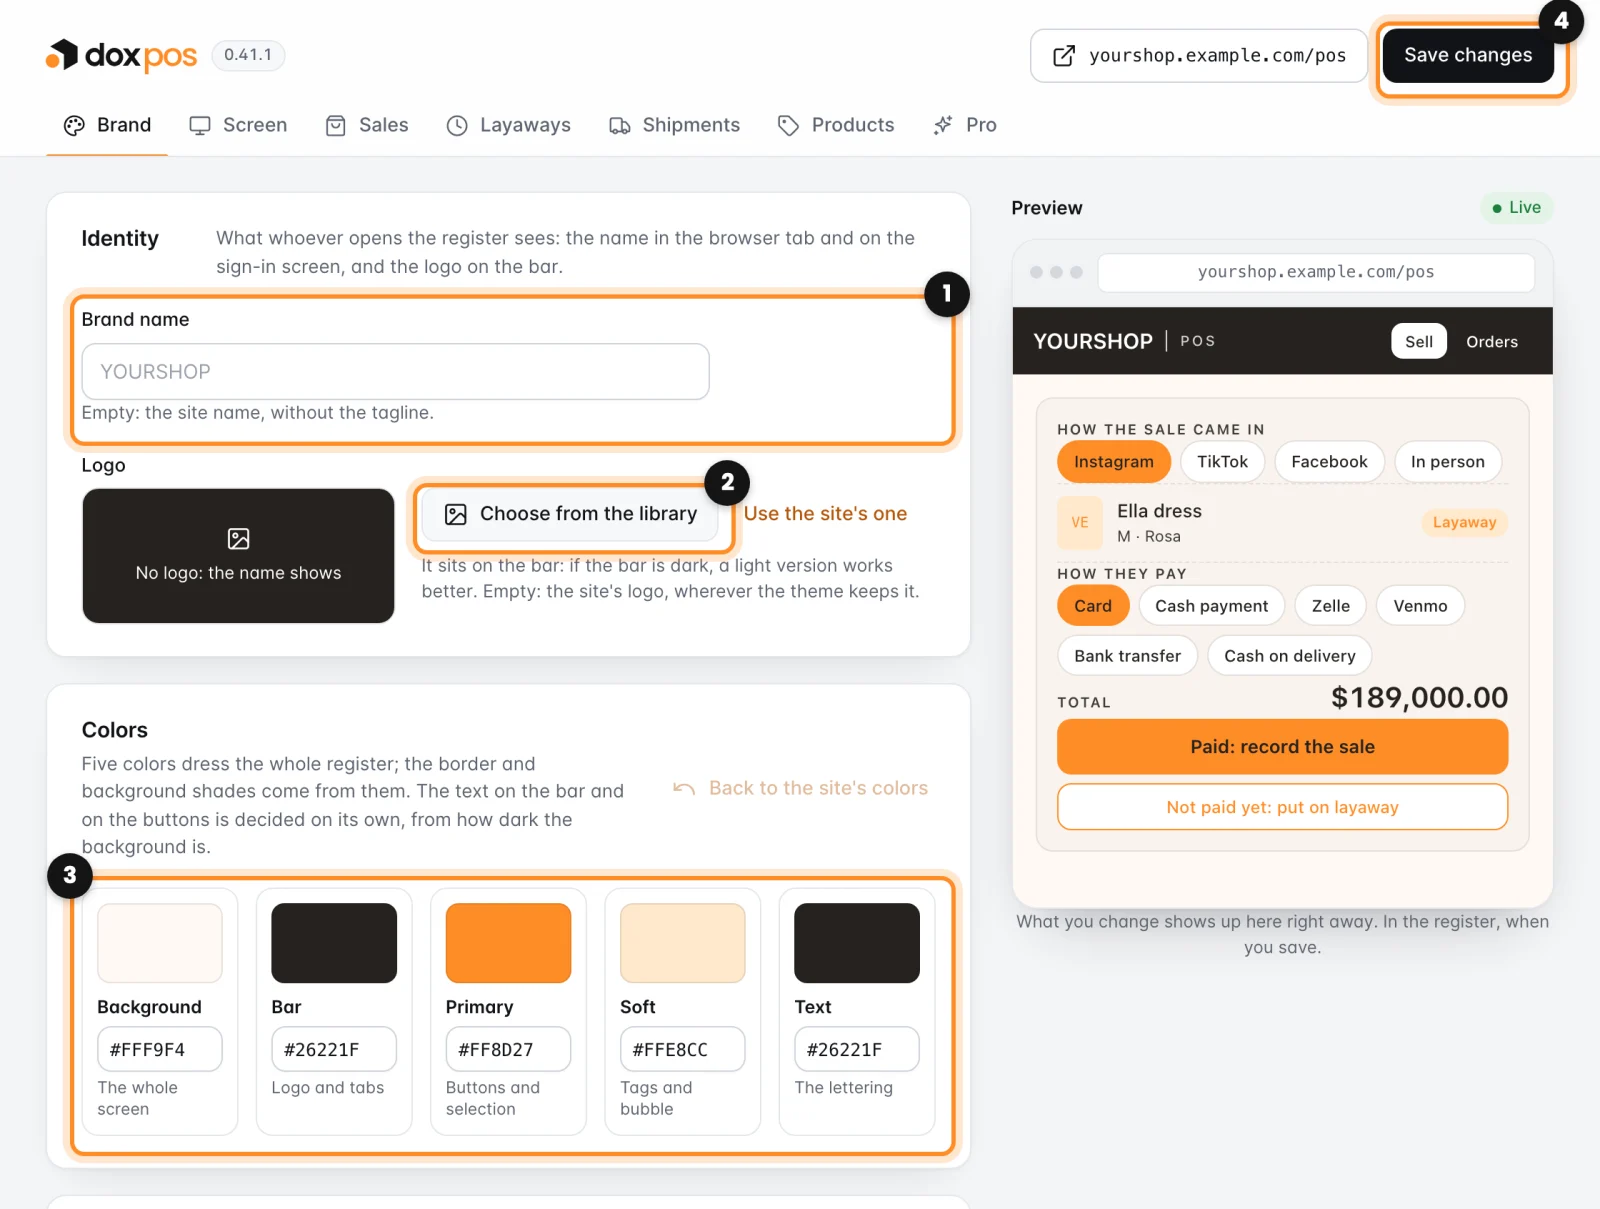
Name and logo
- Go to WooCommerce › Dox POS and open the Brand tab. If you use other Dox Studio plugins, the same page is in Dox Plugins › POS.
- In Brand name (1), write the name that shows in the browser tab and on the sign-in screen. Left empty, the register uses your site name without its tagline.
- Under Logo, click Choose from the library (2), pick the image and click Use this image. The logo sits on the bar: if your bar is dark, a light version works better.
- Want the logo your site already uses? Click Use the site’s one. With no logo at all, the bar shows the name.
The five colors
Five colors dress the whole register (3). The borders and the soft backgrounds come from them, and the text on the bar and on the buttons turns white or dark on its own, depending on how dark the color under it is.
- Background: the whole screen.
- Bar: the logo and the tabs.
- Primary: the buttons and what is selected.
- Soft: the tags and the message bubble.
- Text: the lettering.
Click a color to pick it, or type its code in the field next to it (#FF8D27). Back to the site’s colors puts the five back the way they started. When you are done, click Save changes (4): the register shows the new look the next time it opens.
Fonts: the register uses the fonts the phone or the computer already has, and nothing is requested from outside your site. In Fonts you only choose the one for Totals and headings. If you turn on Load the fonts from Google Fonts, you can type any Google font, and the browser of whoever opens the register downloads it from Google.
The name and address of the register
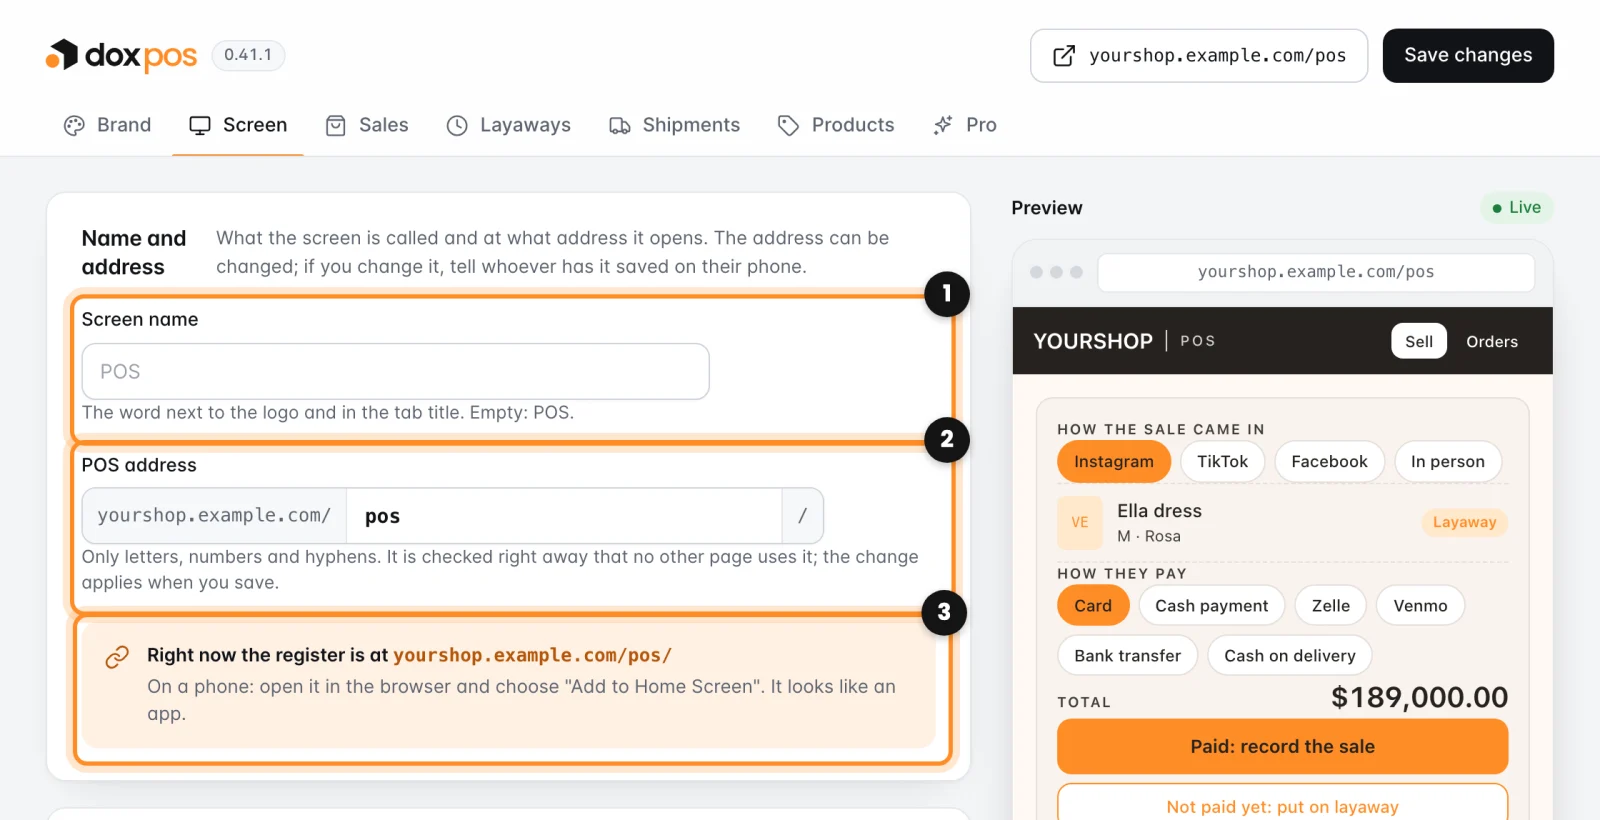
- Open the Screen tab.
- In Screen name (1), write the word that goes next to the logo and in the tab title. Empty, it says POS.
- In POS address (2), write what goes after your domain, for example
yourshop.example.com/pos/. Only letters, numbers and hyphens. As you type, it checks that no other page uses it and says Available. - Click Save changes. The line Right now the register is at (3) shows the address in use; click it to open the register.
Changing the address? Tell whoever has the old one saved on their phone. On a phone, open the register in the browser and choose “Add to Home Screen”: it looks like an app.